itch.io Page || Steam Greenlight Page
This new pseudo-sequel to Voidspire Tactics, which may be my favorite game from 2015, polishes up the existing formula while adding in some useful features and taking a rather large risk along the way. The risk in question is the introduction of procedurally generated areas which incorporate handcrafted rooms and, for the most part, this is a success. This is a shorter and in some ways a much more straightforward game than its predecessor, but it’s also cheaper, the procedural generation gives it more replay value, and the various improvements and new features allow Alvora Tactics to stand on its own as a great addition to any game collection.
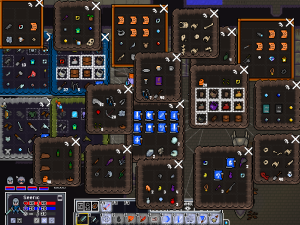
I’ll start by getting the biggest question out of the way – is Alvora Tactics better than Voidspire Tactics? Between the two, I personally prefer Voidspire Tactics, but this comes with a massive caveat. Namely, I prefer the exploration in Voidspire Tactics, which is more nonlinear and provides you with more opportunities to use your skills to traverse the environment outside of combat. This doesn’t necessarily mean that the exploration elements in Alvora Tactics are worse, but they are different. The world of Voidspire Tactics has an open feel similar to that of Dark Souls or a Zelda game while Alvora Tactics is more of a dungeon crawler with a town hub and a big dungeon divided into distinct regions which you go through in a specific order, though the procedural generation gives you plenty of incentive to go back to previous areas. With that in mind, Alvora Tactics is superior to Voidspire Tactics in just about every other way from the combat to the classes to the inventory system (and I cannot stress enough how relieved I was to no longer have to deal with something like this). In other words, if you have to choose between the two I would recommend Voidspire Tactics if you prefer exploration, Alvora Tactics if you care more about combat, and if you care about exploration and combat equally I would still say to go for Alvora Tactics for the various improvements and additions. Of course, at the end of the day the best option of all would be to simply get both games if you can.
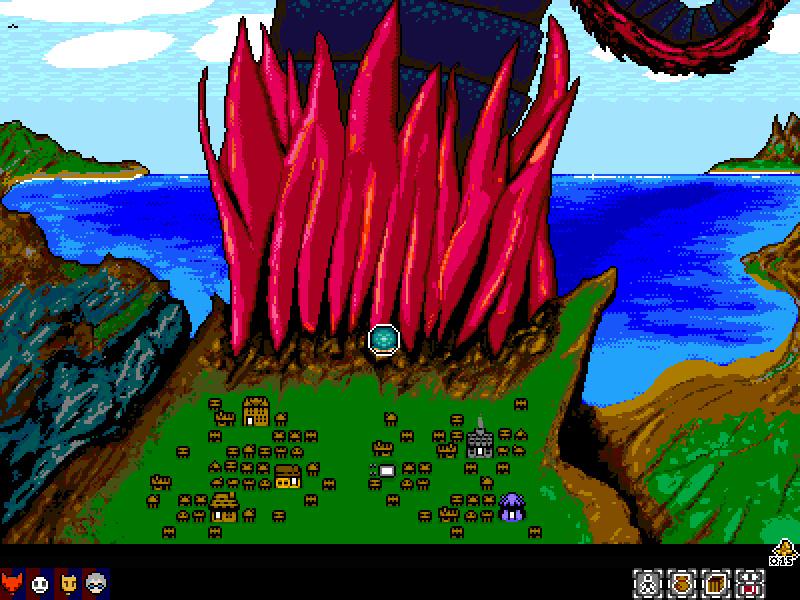
With that out of the way, the best place to begin with Alvora Tactics is with the name itself. The ‘Tactics’ part of the name is simple enough as it indicates that, like most game titles with ‘Tactics’, this is a turn-based strategy game where combat takes place on a grid and where you control a group of characters rather than being able to endlessly produce generic units. But what’s an Alvora? Well, according to the opening cutscene, Alvora was the name of a giant flying serpent which went around devouring anything it pleased, even entire castles, but its dead body was recently discovered crashed into a cliff. This serves as the basic setup for the game as groups of explorers have set up a makeshift town outside of Alvora’s body and have begun to venture forth into the dead serpent for knowledge and riches from the ruins inside. You take on the role of the nameless, unseen, and silent leader of one such expedition group, though you have an assistant, Lorim, who balances out your own character’s lack of identity and you get to name and customize the four members of your team and each of the various rather creative fantasy races (and humans) comes with its own beneficial passive trait, though none of these traits are so vital or so specialized as to prevent you from making whichever type of character you want if you only care about your characters’ appearances.
As with many dungeon crawlers, gameplay is divided between the town hub and the dungeon itself, which in this case is Alvora’s massive corpse. The town consists of several dozen houses, nearly all of which are made of wood, which all look minuscule next to the looming body of Alvora, which is big enough that the head alone is the size of a mountain. You don’t physically move around this hub and instead have several different locations you can click on to travel to. There’s the blacksmith where you can buy weapons and armor, sell just about anything not made of bone, spend money to upgrade the tiers of weaponry available, use the forge to melt equipment down into ore, use ore on blueprints found within the dungeon to make new equipment, and use the anvil to augment equipment with items which grant various benefits like increased lightning damage or poison resistance. The tavern doesn’t have as much to it as the blacksmith, but it’s equally as useful because it allows you to accept jobs to find specific materials and cash them in for significantly more money than the blacksmith would pay you; you only have access to one offer at a time and some of the items requested are much rarer than others, but it changes each time you exit the dungeon unless you locked it in by officially accepting it. You also have your own home, which is largely useless beyond mounting trophies from bosses and other items on wall plaques, but it does have a large storage bag hidden in a crate which is worth picking up as soon as you possibly can. Lorim’s house is decidedly more useful than your own as Lorim always has a random assortment of four items to buy, which changes each time you exit the dungeon, and you can talk to Lorim herself to unlock checkpoints between regions in the dungeon for gold and to get some lore or advice. Lorim and all the other main NPC’s in town have quite a few lines of optional dialogue which help to flesh them out as characters; I wouldn’t go so far as to say that I grew attached to any of the characters, but they are likeable enough that I always chose the ‘Chat’ option whenever it appeared and this is a big step up from the generic and forgettable NPC’s which populated the main town of the previous game.
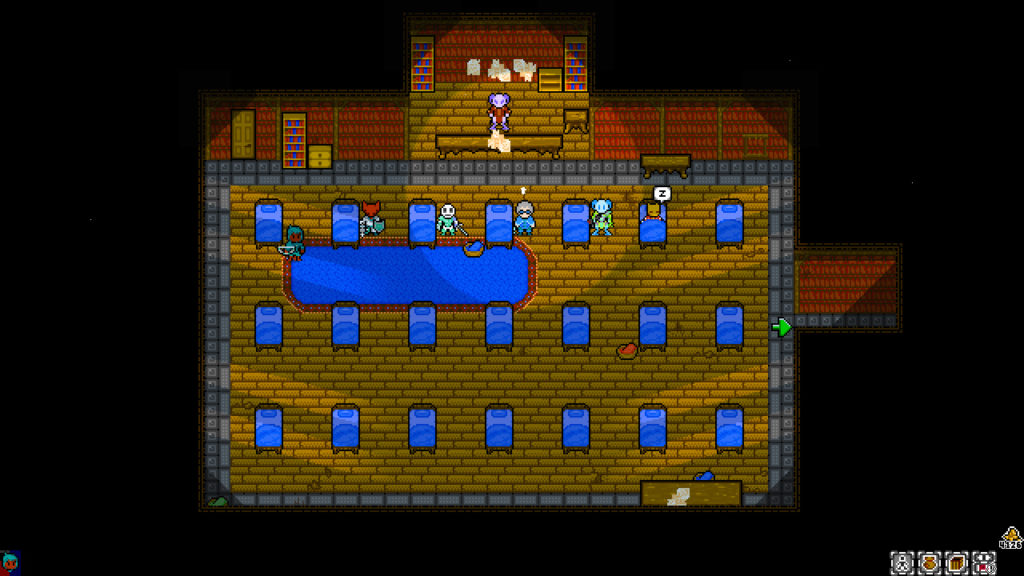
Before moving on to the dungeon itself and the bulk of the gameplay, there are two last town locations of particular note, the barracks and the training area. Unlike in Voidspire Tactics, you’re not limited exclusively to using the four characters you started with and the barracks is the place where you can swap out old characters and recruit new ones. You can pay a small amount of money to recruit a random character or pay a slightly higher amount to recruit a character of a specific race if you have a certain passive in mind. The one downside to this system is you don’t get a reminded of what each race actually is when presented with the list. You have a journal where you can look up entries on any creatures, objects or equipment you have examined, but if you have yet to examine a specific race (or if you just don’t feel like searching through the journal) then you may as well be picking blind anyway unless you can remember details from the initial character creation like a Buralk being a bug person who gets a bonus to physical and magical defense. Some sort of confirmation message detailing just what the thing in question you have chosen looks like and does would have been welcome here, but it’s ultimately a small issue within an otherwise great new feature.
Each character you recruit has a randomized name and starting appearance, but you can freely edit every aesthetic aspect of any party member whenever you want, including their name, with the one exception being their race as that ties in with the racial passives. It seems like there’s technically a limit of 21 characters judging by the number of beds in the barracks, but this is high enough that I never even came close to hitting it and if you somehow do manage to run up against it you can always dismiss a character you don’t like. Characters who have been reduced to 0 health at least twice start suffering from reduced maximum health unless you let them sleep in the barracks for at least one ‘successful’ mission. A successful mission simply counts as any dungeon attempt in which you gained at least one gold or one point of experience so it’s simple enough that you can get just quickly go in with a smaller party and kill something weak if you want to, but it also serves as a way of encouraging players to mix and match their party members. Speaking of encouraging party experimentation, the barracks is not the only addition to Alvora Tactics to contribute towards this goal.
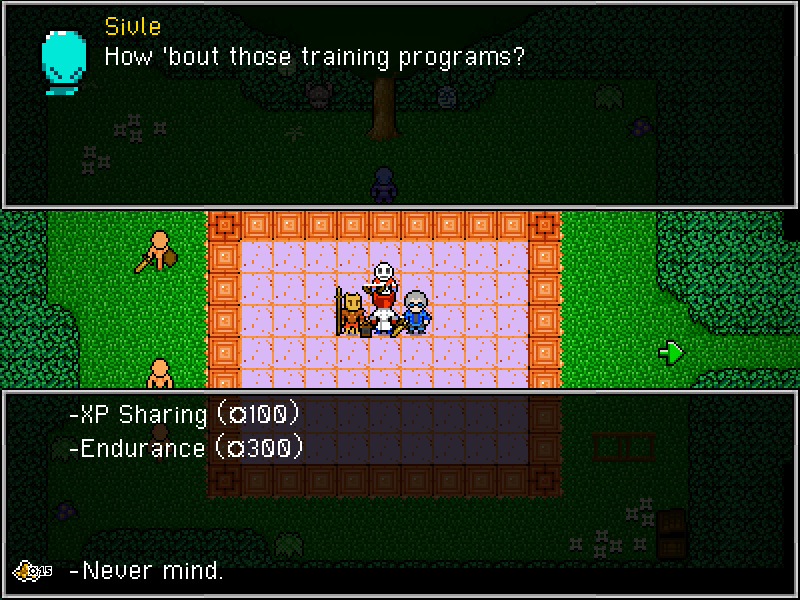
With the possible exception of the introduction of procedural generation within the dungeon, the training area is the most significant new feature. At first the things you can do here seem useful, though not revolutionary. You can get some basic information on how classes work, how to unlock more classes, and how to look up what stats do, you can pay money to instantly unlock three new classes for every character on top of the default ones of Warrior, Scout, and Scholar, and you can pay to get passive benefits for your group. That last one is the part that’s secretly a game changing addition because alongside nice little bonuses like +3 HP for everyone and +1 movement range are two sets of vital passives. The first of these is the ability to increase your maximum party size from four to five and, after clearing the first area of the game, from five to six for a very low cost. This 50% increase over your initial party size completely changes the dynamics of the game as it allows you to create a new world of class combinations. It also means groups of enemies can be significantly larger and the individual enemies themselves can hit harder because you can still recover from losing one or two party members. Though it’s not immediately apparent, the most substantial benefit to this larger party size is it creates some much-needed breathing room for certain classes. With a party of four there is a sort of urgency when it comes to dealing damage and maintaining the upper hand in combat which makes it hard to justify bringing along classes like Mechanist, which is very powerful yet needs one turn to toss a mine and another turn to detonate it, or classes which focus on support, such as the Unmaker which trades in the range, elemental variety, and raw damage of the Sorcerer class in exchange for access to status ailments and situational debuffs. Since battles have a larger scope they usually take longer to fully resolve so you can have plenty of party members dedicated to immediate damage while still having room for characters who exist purely for the sake of utility or for more long-term forms of damage.
The second of these important passives is more expensive and isn’t quite as significant as the first set though it’s close as it passively shares 5% (10% with the second upgrade) of all class experience earned by all characters with all other characters. To put this into perspective as to why this is so valuable, every 400 experience points in a class earns a character a star which can be spent to boost weapon or spell damage or just increase their HP or MP and the main way to unlock new classes is by hitting certain experience requirements in previous classes. In other words, any new characters you recruit won’t immediately be as strong as your existing ones, but they’ll still start with plenty of experience points in all sorts of classes which they can spend to unlock and upgrade skills as well as those passively beneficial stars so they can catch up to your other characters pretty quickly and provide an experience boost of their own for everyone else. Even existing characters sleeping in the barracks still gradually grow stronger from your fights while they heal up. The barracks provides you with a way of changing up your team, but the experience sharing from the training area allows you to swap around old characters for new ones or just change an existing party member’s class to a different class which they personally have never been before without immediately suffering from a massive drop in power for your group. Alvora Tactics may not have the same degree of freedom as its predecessor when it comes to exploration, but it has far, far more freedom when it comes to allowing players to customize and experiment with their characters on both an individual and a group level.
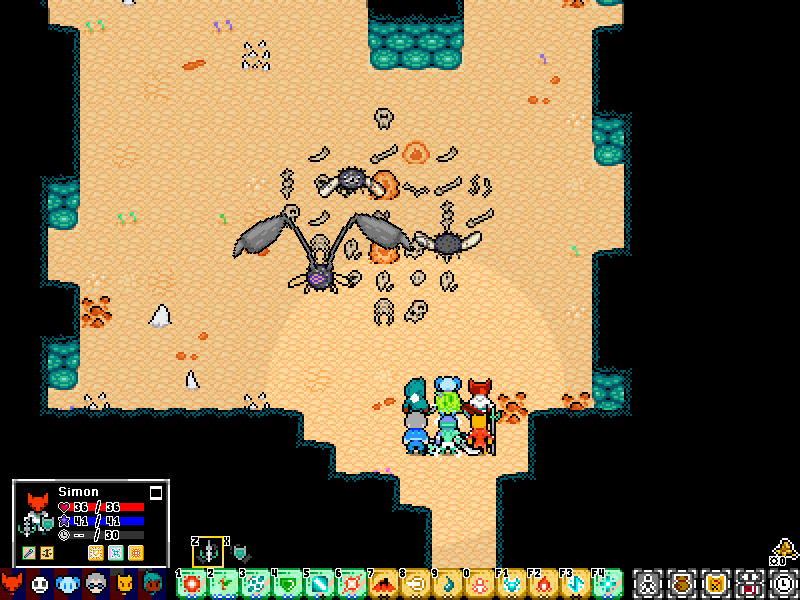
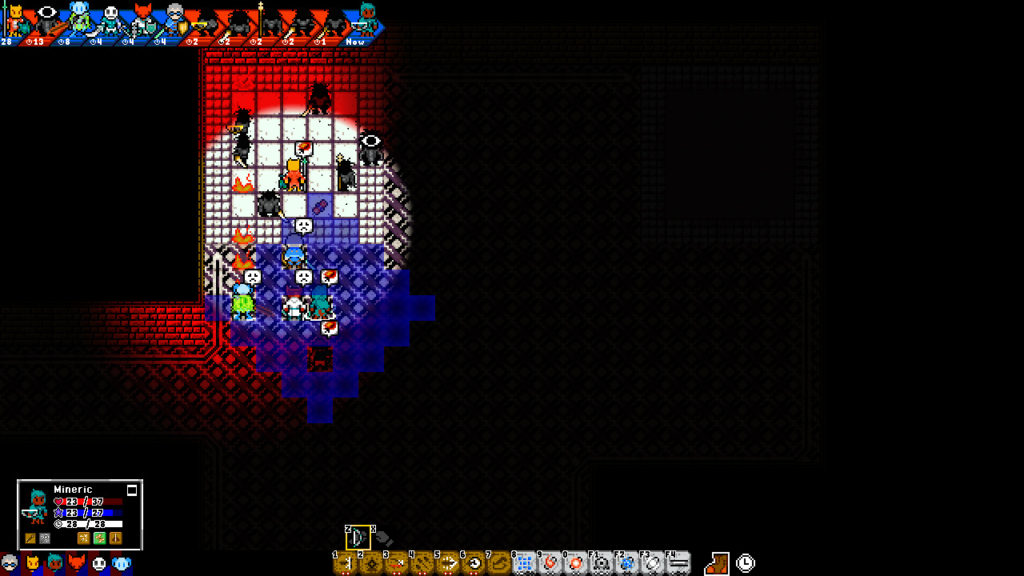
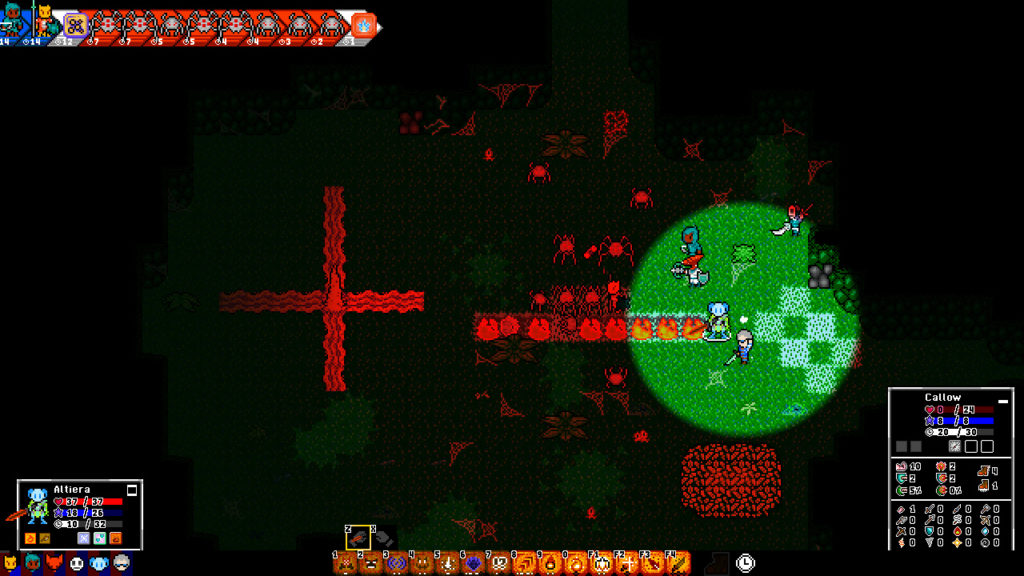
Let’s see, there’s your house, Lorim’s house, the blacksmith, the training area, the tavern, the barracks and…oh right, the dungeon! Yes, it’s at last time to take a look at just what it’s like to walk around inside the corpse of a city-devouring flying serpent. Within the dungeon you have direct control of your team and can move them around with either WASD or the mouse. Characters march in a line and you can easily change the leader by clicking on an icon of their face in the lower-left corner or swap character positions around by clicking and dragging these icons, which is useful whenever you want to cast buffs with a small range or area of effect outside of combat or if one character is carrying a light source in a dark location. Smaller items can be picked up and moved around or put in a character’s inventory with the mouse and you can click on just about any object at any time outside of combat with the Look command to get a journal entry about it for additional information. Other parts of the environment require more direct forms of interaction from your party members. For example, you can break cracked objects by attacking them while you have a hammer equipped, you can freeze water to walk on it with an ice spell, and any sort of fire skill can be used as a temporary light source or as a way of clearing foliage and lighting braziers. Digging from the previous game is out completely and mining is gone as well, though there are still ore deposits in the walls which you can now take simply by clicking on them. In general environmental interactions aren’t all that important while exploring this time around, but there are more environmental hazards which you can use to your advantage in combat like spikes made from teeth and pods that can be attacked to make them burst open and hit anything near them.
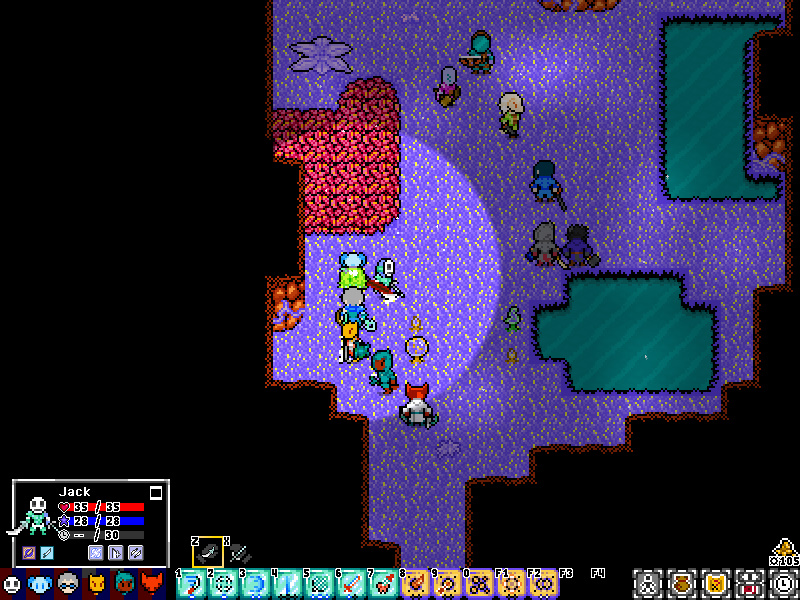
Every region is aesthetically distinct and comes with its own set of enemy types and objects, but most regions can be divided into what I’ll call external and internal areas (yes, I know everything is technically an ‘internal’ area of Alvora, but just pretend that it’s not for now). External areas are where the procedural generation happens. These consist of multiple large rooms connected to each other and your primary goal for these parts is simply to find the exit to the region, which always takes on the form of a large tunnel, which is important to keep in mind because you can’t go back to a previous region during a run once you step through that door. There is a transitional area between regions where you can drop through an opening to go back to town (these are also the areas the shortcut warps from Lorim take you to), but you are always free to simply press onward and, even though you can’t go back to old regions without exiting the dungeon, you can return to the last transitional room to leave at any time. Most fights in external areas are completely optional as you often have more than enough room to walk around enemies without them spotting you, but you’re going to inevitably run into some serious trouble with any mandatory fights if you just avoid everything along the way since you’ll miss out on experience points and loot from both the enemies themselves and from some sort of prize which enemy groups are usually stationed around.
The inside of Alvora is crawling with its fair share of insects and monstrosities, but the most interesting encounters are those which pit your team against other humanoids. Some groups of humanoid creatures are always hostile, such as the vine creatures in the forest region, but fellow adventurer groups can be negotiated with to avoid conflict while still getting a decent chunk of experience points and, unlike in Voidspire Tactics where seeking peace was almost always a lost cause, negotiations seem to be successful at least half the time. Of course, other adventurers are often carrying all sorts of powerful and valuable items to loot and fights against them are some of the most satisfyingly intense ones the game has to offer because they have access to all the classes and racial traits which you can potentially have so picking a fight isn’t exactly the worst idea in the world either. Other than fights external rooms can sometimes contain puzzles like sliding around blobs which explode and reveal items when they touch each other or pushing around blocks with pipes which you have to connect to open a treasure chest. These puzzles are interesting enough the first time they appear, but once you go into the same region a few times you’ll start to come across the same variations of these puzzles in different rooms and I usually just skipped them after solving them once or twice since the loot was generally not worth the time it took to push around the same patterns of blobs and blocks. Finally, you can also encounter caves in the external areas which lead to the internal locations.
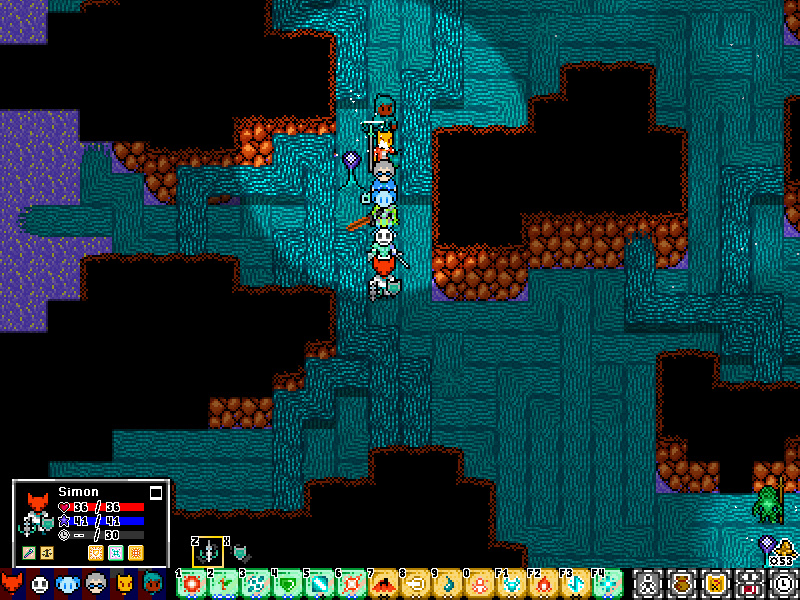
Unlike the external area, internal areas are handcrafted and usually consist of one or two rooms. Any enemies you defeat and any items you take in internal areas don’t come back on future runs, but the layouts of each of these locations are usually distinctive enough that you can quickly tell if you’ve already been somewhere upon entering it and you’re not going to see every internal area a region has to offer in a single dungeon run. Since everything in these locations is handcrafted, these are the places where you’re going to sometimes need to use a certain type of ability in order to progress and encounters here are usually more difficult than those found in the external areas other than those against the rival adventuring groups and boss fights (though on at least one occasion I had to fight two copies of a boss at once in an internal area). Of course, the higher degree of difficulty comes with better rewards for your efforts. Sometimes the reward takes the form of new equipment, significant amounts of gold, or rare crafting materials, but the big prizes here are blueprints and masks.
Blueprints were around in Voidspire Tactics, but they’re a bit more convenient this time around. Each blueprint is tied to a generic type of equipment, such as a shield blueprint or a rapier blueprint, and it gets transported from your inventory to the blacksmith shop in town once you leave the dungeon. To use a blueprint you simply drag a piece of crafting material over to it and it makes an item of that type. Blueprints can be used infinitely and you don’t need to pay to use them either so, for example, you can use a piece of steel ore on the dagger blueprint to make a steel dagger and once you no longer want that dagger you can use it on the forge to turn it back into a steel ore and use that on the armor blueprint to make some steel armor instead; it’s a simple and flexible crafting system which doesn’t waste your time and allows for plenty of possibilities once your blueprint collection starts to grow. Masks are an entirely new feature in Alvora Tactics and, like the barracks and the training area, they exist to allow players to easily experiment with the party combinations they really want to try out. Each mask is tied to a specific class and once you bring it back to town that class is unlocked for every party member even if they haven’t met the previous experience requirements. This means that classes you normally wouldn’t be able to even touch until getting pretty far into the game, such as the Enchanter class which normally requires a character to have over 1000 experience in both the Warrior and Scholar classes, can be accessed significantly sooner depending on which masks you get and new characters can likewise jump straight to advanced classes. Though you can sometimes find masks and blueprints in the external areas, they are far more common in these handcrafted segments. As far as procedural generation goes, some masks and possibly some blueprints are definitely tied to specific fights, but I think for the most part the locations of masks and blueprints in internal areas are fixed in stone while the actual identities of these items are randomized so the order in which you gain access to classes and item types can vary between playthroughs.
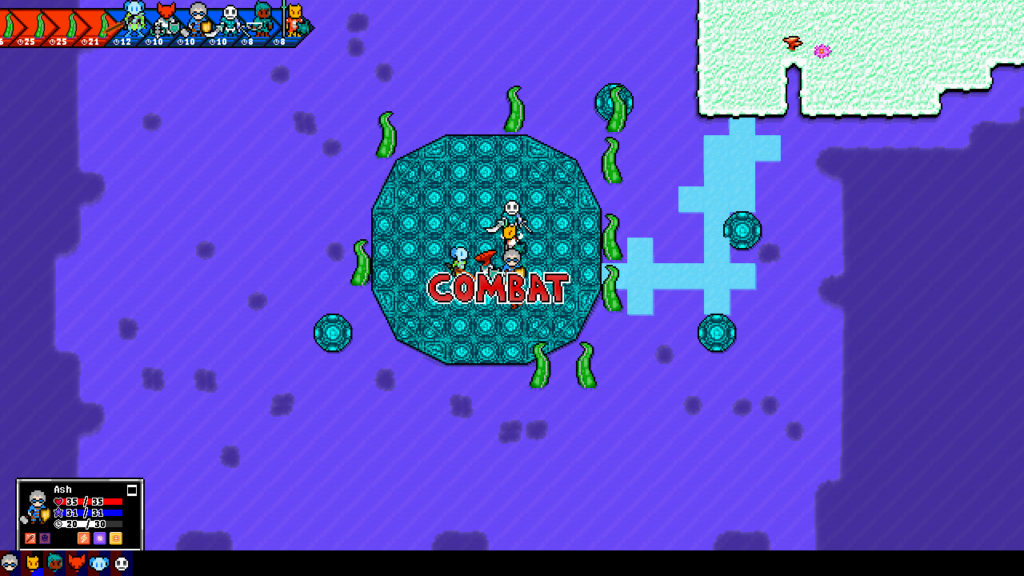
Combat is largely the same as in Voidspire Tactics with a few subtle changes. This is a low-numbers game, meaning a single additional point of attack or defense can make a noticeable difference and even with the larger scope to the fights battles are still just as brutal as ever with friends and foes alike capable of being killed within three or so hits; anything with enough health to even come close to 100, let alone going over 100, is a serious threat. Turn order is determined by an action timer which counts up for each character. In most cases this timer is equal to 30, meaning a character gets to take another turn 30 time units after their previous turn, but some abilities and racial passives can increase or decrease this number slightly. Since fights don’t actually start until an enemy notices you, you can freely apply buffs in advance, though they’re wear off if you wait too long since time passes with each step you take, and you can get a free hit in before combat with ranged attacks. As is common for the genre, you can choose which way you face when you end your turn and attacks from the side and especially from the back have a much higher chance of hitting. Height isn’t a factor aside from when it comes to jumping over obstacles or across gaps, but light is incredibly important for accuracy so using up a character’s offhand slot to carry a lantern or taking a turn to set some stuff on fire is worthwhile. Every weapon comes with its own set of advantages and disadvantages and some of these are pretty interesting, such as spears being long enough to hit two tiles in a row, flails can attack diagonal targets, and crossbows are strong, but have less range than bows and need to be reloaded.
The most substantial combat change this time around concerns turn order. In Voidspire Tactics the initial turn order was randomized with the turns of your party members and enemies intertwined with each other while in Alvora Tactics your entire party gets to act first. The developer himself wrote a rather extensive article about why this change is beneficial right over here, but the basic gist of it is that it benefits casters. Many spells, both of the damaging and of the beneficial variety, have a cast time and target part of the grid rather than a specific character. With the original system it could be incredibly difficult to use spells with long cast times because enemies could often simply take their turns a few time units after your caster’s and easily move out of the way of the spell before it went off; having less speed ended up being beneficial for casters because they could start casting right after an enemy moved rather than the other way around. With the new approach to turn order being faster guarantees that a caster will get more time in which to cast a spell. Extremely strong spells like the massive attacks of the Gatekeeper class still take long enough that many units can move out of the way in time and units near the very top of the enemy turn order might be able to get out of the way of spells with shorter cast times, but there will almost always be at least a few units whose turns are far enough away on the timeline that they can’t escape. Other than offensive casters, this change also adds in a few twists for support characters. Fast support characters can start casting a buff on a part of the map where you know you’ll be sending your other units, but it can be difficult to gather up every character you want to give the buff to in one general location if the buff has a fast cast time since not everyone may get a turn before the spell goes off. Conversely, slower support casters and slower support spells benefit from being able to definitely group up the rest of the party in time for the buff, but the spell will likely go off in the middle of the enemies’ turn order, which gives them time to kill or move the units you’re trying to aid or to walk within the area of effect and gain the benefit for themselves.
Classes remain mostly the same, though spells have increased cast times to balance out the more clearly defined nature of the turn order, stat buffs have higher values since one point in a stat is now equal to precisely one extra point of damage or damage reduction, and a few skills have been rebalanced. Other than the various ways in which characters can now more easily gain access to and progress through classes, the most substantial change is the addition of five new classes, putting the total up from 18 to 23, but I’ll briefly go over how classes work for those unfamiliar with the first game. Whenever a character gains experience points those points are specifically for the class which they are currently using. Classes don’t level up and instead each class has seven skills which experience points can be used to learn and upgrade. You don’t get to choose how to upgrade a skill, but general buffs and debuffs last longer, ranged abilities can go one tile farther per upgrade, and offensive skills get either a damage boost or can hit one additional target per upgrade. Beyond the normal skills you also can learn three passives from each class; you don’t benefit from a passive unless you put it in one of the three passive slots available to a character, but passives can be carried over between classes. You also gain one star for every 400 experience points you earn in a class, which can be spent to permanently boost HP and MP or masteries with weapon types and spells for increased power and accuracy; masteries carry over between classes but stars do not, so you can use stars gained from shared experience in classes you’re not using to learn the lower levels of masteries and then save stars from your main classes for the more expensive tiers. You can change classes at any time outside of combat and you can have both a main class and a subclass with full access to the skills of both, though you only gain experience for your main class and each class has a few stat boosts which you only gain when it’s set as your main.
I like the original 18 classes well enough, but all of the new classes are fantastic. I am particularly fond of the Ignis Knight class, which is a melee class with some ranged fire abilities and skills which benefit from setting itself or enemies on fire. Meanwhile, the Berserker class is the one which fills in a role that was otherwise missing until now. Many of the skills the Berserker has access to either force enemies to turn around and look at it or have a higher chance to work against enemies looking at it and, more importantly, several skills boost its own morale and/or reduce the moral of enemies. Morale is a factor which otherwise doesn’t come into play too often, but it’s rather useful as good morale boosts attack and defense while bad morale reduces them. There have always been a few skills which turn around enemies or affect morale, but this is the first class to really be focused on playing around with both of these mechanics. Aside from these two classes there is also the Ruiner, which has a bunch of multi-target spells with status ailments, the Warp Blade, which can use portals to shift around allies and enemies or to attack multiple targets from far away, and, by the far strangest of the new classes, the Bat Handler, which can summon a giant pet bat and has skills primarily dedicated to affecting movement and evasion. This isn’t to say that the old classes are inferior to the new ones, I still love to fill a character’s inventory with crossbows and make use of the Scout’s Quick Hands passive to swap to a new weapon every turn without wasting an action to do so or to reload, but the new classes are consistently fun to use and are welcome additions to an already solid and varied selection.
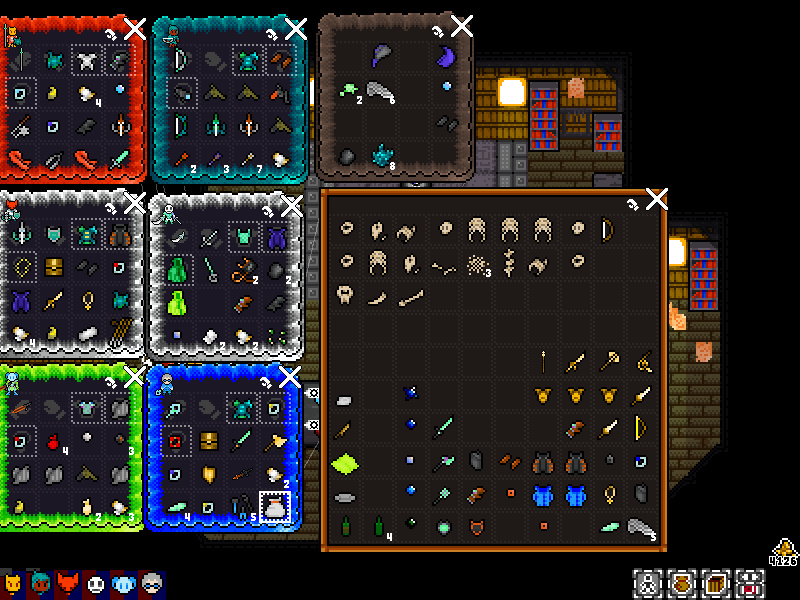
There are a few general quality of life upgrades worth noting. The most important one as far as I’m concerned is inventory management because, if I haven’t made it clear by this point, your inventory was a mess in Voidspire Tactics. Before, you had limited space for items and had to rely on bags, so you had a a big bag for medium bags, medium bags for small bags, and a small bag for blueprints, a small bag for extra consumables, a small bag for alternate equipment, and so on. While your inventory space on a per-character basis is the same as before, having two more characters to help carry stuff around helps a lot with inventory management. The presence of a main town which never takes long to return to, and which you are encouraged to return to for new passive upgrades and checkpoints, is also important as it makes it easier to cash in items at the store and the blacksmith automatically taking your blueprints likewise frees up a good chunk of space. Most importantly of all, having a large bag to carry around right from the start rather than needing to find a bunch of small bags helps a lot and even if you didn’t find the bag early on you have access to a massive stash in town where you can store any items you’re not using.
I may be a bit overly excited for the presence of some basic inventory management features, but the other small additions are also quite nice. The procedural generation by its nature means you never need to worry about running low on enemies to fight. I may prefer the purely handcrafted exploration of Voidspire Tactics, but one way in which the general lack of random elements worked against that game was that you sort of had to decide on just what you wanted each character to do early on since your experience points were limited unless you wanted to seek out adventuring groups to fight at a handful of locations. Saving in Alvora Tactics is just as generous as ever by default as you can manually save at any point outside of combat and autosaves are created at every screen transition, but for those seeking a more traditional rogue-like dungeon crawling experience there is a ‘Hardcore’ mode which only allows you to save in town, which can be quite demanding if you combine it with the unlocking Ruin difficulty where enemies have much higher stats and new skills. Improvements have also been made to the UI to give it a much smaller presence on the screen without losing any functionality. Even the general way in which classes are aligned has been improved, moving away from two rows of classes scattered about to an organization which places the three starting classes up top while dividing the remaining classes into two rows with most classes positioned near the other classes required to unlock them and the addition of lines pointing to prerequisite classes while mousing over them. In fact, the only aspect in which I think Alvora Tactics doesn’t live up to or exceed Voidspire Tactics other than when it comes to my personal preference of handcrafted exploration over combat is in the music; the soundtrack is still solid, but it doesn’t quite match the incredible battle themes created by Kevin Phetsomphou.
Voidspire Tactics may still come first in my heart, but Alvora Tactics is a rather close second and it manages to carry over many of the best elements from the first game while having a distinct identity of its own. I would love to see all the new features and enhancements Alvora Tactics adds to the formula in a larger, primarily handcrafted entry in the future, but for now this is still a fantastic second entry to one of my favorite series.