Retro sidescrolling adventure RPG’s and minigames are two things which don’t seem like they should go together, yet Creepy Castle, for the most part, makes this odd combination work. With a combat system based on performing various WarioWare-style minigames, around 15-20 hours of gameplay spread across five scenarios, a surprisingly engaging story, and plenty of secrets to find along the way, Creepy Castle makes for a particularly memorable experience. There are a few points at which it begins to overstay its welcome and I am not particularly fond of the third scenario for reasons which I will cover later, but when the formula works, and it does work for the vast majority of the game, it works exceptionally well.
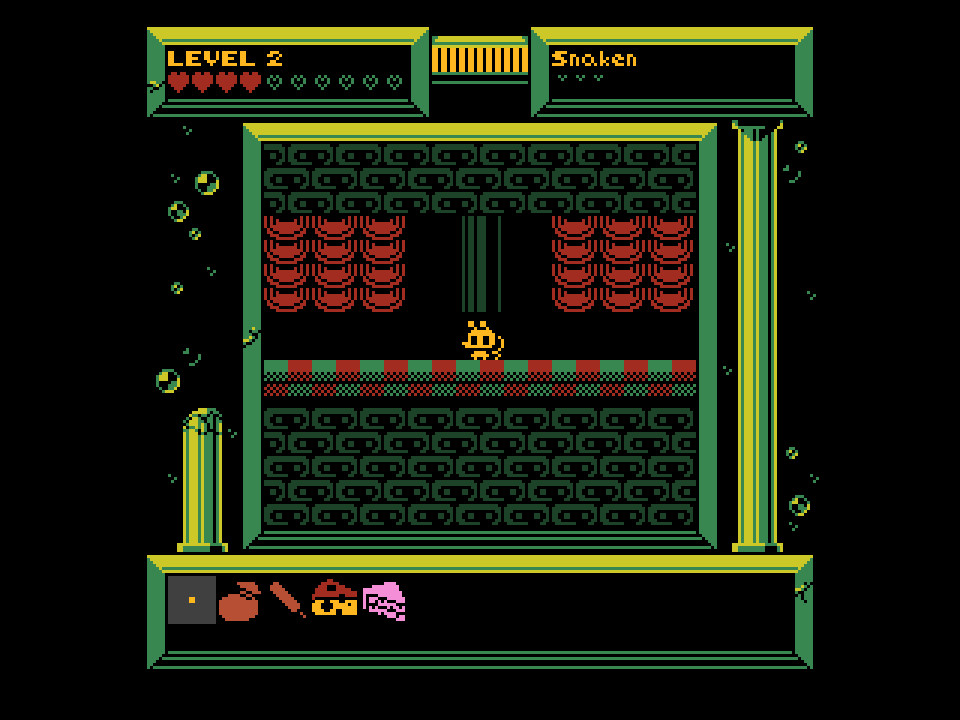
The first scenario is the only one which is unlocked at the start of the game and in it players take on the role of Moth as he explores the titular creepy castle. The start of this scenario serves as a tutorial and even though the game as a whole is rather unique, its individual components are familiar and easy to grasp. You make your way through the castle collecting keys to open doors, defeating enemies, finding various types of food to heal with, and discovering crosses to level up. There’s no jumping, but there are secret passages and you can fall off of certain ledges. The number of crosses you need in order to gain a level is equal to your current level (ex: you need three crosses to go from level three to level four) and the actual act of gaining a level results in every enemy taking one less successful hit to defeat so a single level up is always rather significant, but it starts to take quite a bit of exploration to gain a single level after the first two. Healing items are especially important since your health doesn’t refill upon using a save point; enemies don’t respawn and the quality of the healing items which you get from chests is affected by how well you’ve been doing in combat (i.e. you tend to get stronger healing items if you are taking a lot of damage) so it’s impossible to save yourself into a corner from which you can no longer progress.
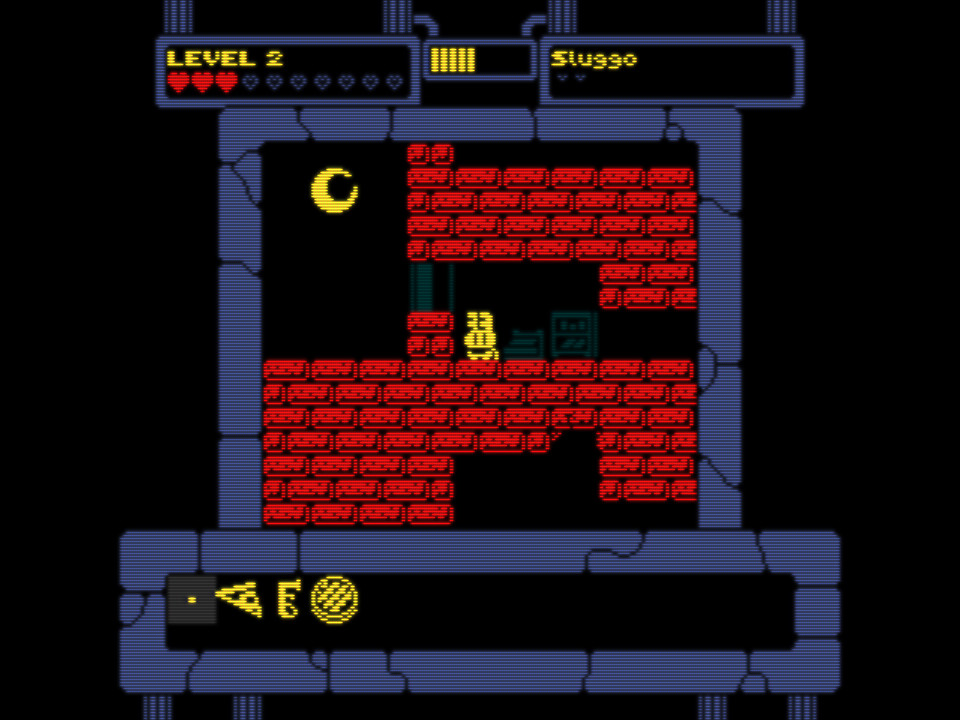
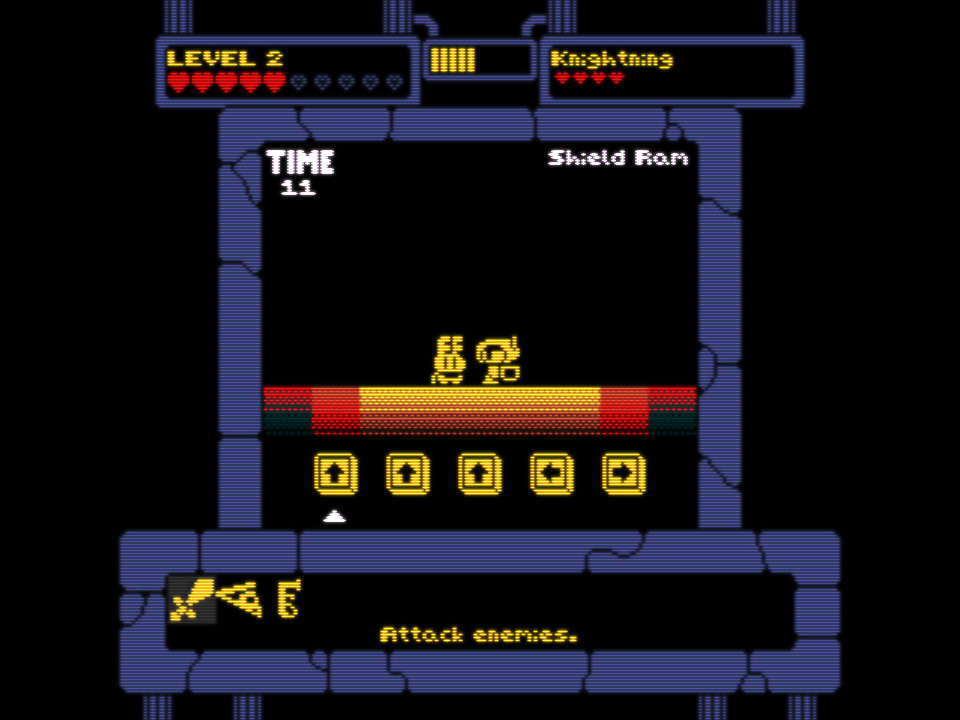
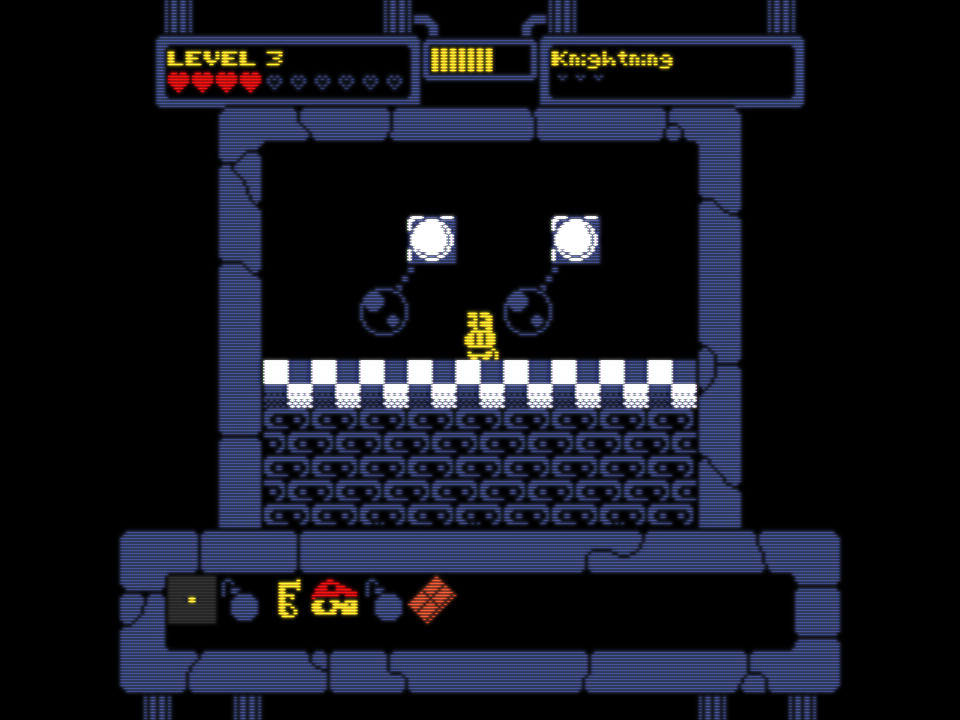
Combat is where the minigame mechanics come into play and this is where things get unusual. Enemies don’t move around on the map and you need to be the one to engage them in combat with the action command. You can even walk away from any fights against normal enemies whenever you want to with no penalty attached, they won’t even recover the damage they took. Combat itself is technically turn-based and doesn’t involve a minigame every turn (though it usually does). When a minigame doesn’t come into play, each press of the action button results in a simple trade between your character hitting the enemy for one point of damage and the enemy counterattacking for one point of damage. Critical hits by both players and enemies deal two damage and there is never a minigame when an enemy is down to a single point of health so, when combined with the fact that the protagonist always gets to attack first, any enemy which is down to its last point of health, or which only has one point of health left to begin with due to the player gaining enough levels, can be safely attacked with no danger of a counterattack.
Up to this point, combat is simply a numbers game where you are guaranteed to ultimately win any exchange as long as your current health and healing items add up to more than an enemy’s health, but minigames add in a much-needed element of entertaining uncertainty. Every minigame can result in getting a perfect rating where only the enemy takes damage, an ‘okay’ rating where both you and the enemy take damage, or a failure where only you take damage. These minigames, referred to as ‘duels’ by the game itself, are mixed in randomly with the standard exchanges so you can have an entire encounter without any duels or one which is nothing but duels (aside from the final hit), but usually fights consist of a bit of both. The exact chance of a duel occurring seems to vary with each enemy type, and several enemies definitely have a 100% chance of each exchange resulting in a duel, but each enemy type also has specific types of duels tied to it, so learning what to expect from each enemy becomes as important as learning the duels themselves.
With the exception of a few one-offs, there are a total of ten types of duels in Creepy Castle, most of which only last somewhere between five to ten seconds. This may sound like a dangerously low number if you’re thinking of these as standard minigames, but every duel has factors which vary depending on the enemy type it is attached to. Many enemies also have two or three of the duel types tied to them, so you may not even see everything an enemy type has to offer the first time you defeat it. I won’t go over every duel, but I do want to take some time to discuss the three most basic duels and three of the more involved ones.
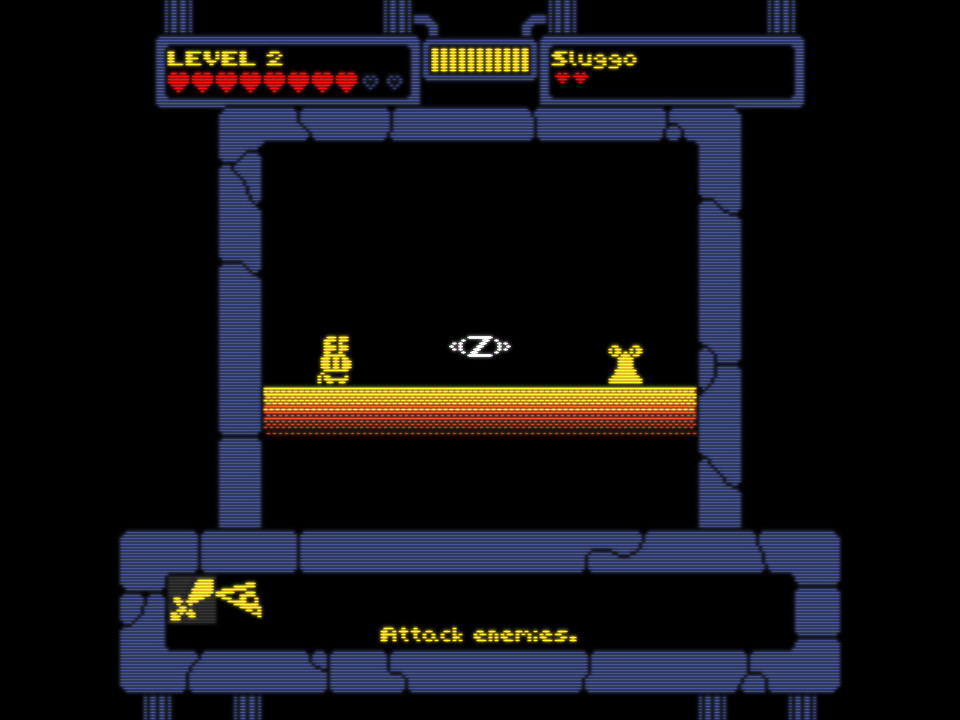
The very first duel you encounter is named Quick-Draw and it is definitely the most simplistic one. In Quick-Draw you and the enemy are positioned on opposite sides of the screen and you need to wait for an indicator to appear before pressing the action button. Attacking too soon or too late results in a failure, reacting immediately results in a perfect rating, and being a bit too slow to draw results in an okay; the only thing which changes between enemy types for Quick-Draw duels is just how much leeway you have after the indicator appears. Many people have already seen this minigame in one form or another elsewhere, but it’s a classic with just enough tension to prevent it from ever getting old.
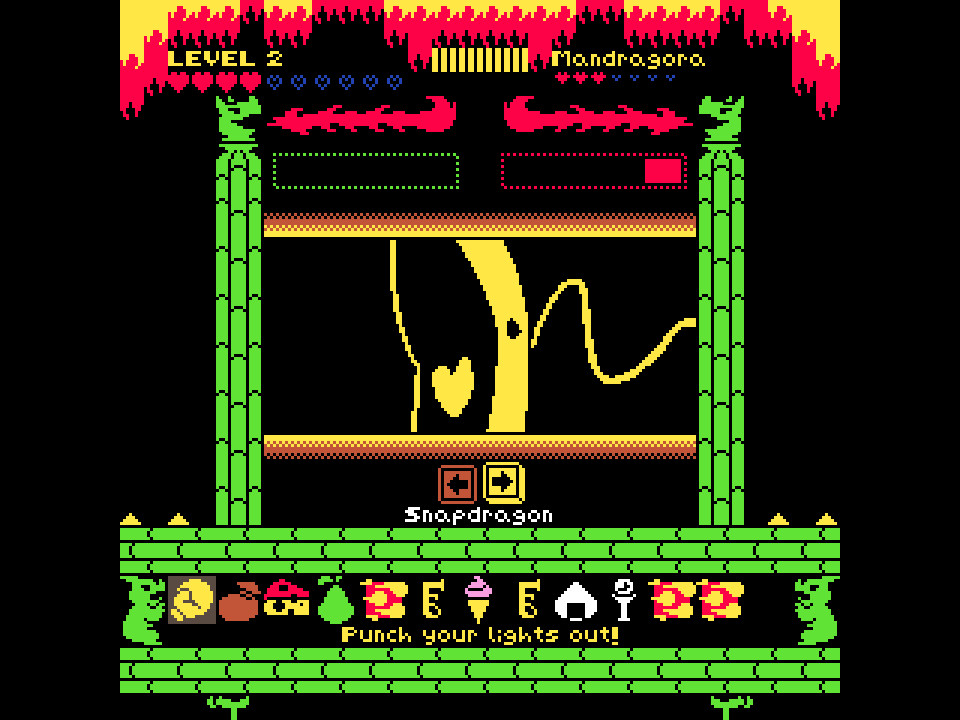
The second type of duel is called Struggle and in this one you need to alternate between pressing right and left as quickly as possible to fill up a bar before the enemy fills up a bar of its own. Both the speed at which your bar fills and the speed at which the enemy’s bar fills varies based on the opponent so in some cases it’s simply a matter of mashing as fast as possible for a brief period of time while in others it’s more important to keep up a good pace for an extended period. Struggle is the only duel in which you can end up taking more than one point of damage because when the enemy’s bar fills it simply knocks your own bar back a bit and then begins filling again for another hit. Struggle makes for some fun and frantic button mashing with its uniquely high sense of danger and every Struggle duel features a large, animated picture unique to the enemy in question, such as a snake trying to eat the protagonist or a flower spreading deadly pollen.
Sumo is the last of the basic duels and it is, unfortunately, the only duel type in the game which I don’t particularly care for. Your character and the enemy both start in the middle of the screen and try to push each other to the opposite edge within the time limit; time running out before a victor can be decided results in a draw where both you and the enemy take damage. Strings of commands appear at the bottom of the screen indicating to press a certain direction or the action button and every successful press results in pushing back the enemy slightly more towards its side while messing up an input causes the opponent to recover a large amount of ground which usually results in the duel ending in a failure or a draw. Some enemy types are aggressive, pushing strongly and being significantly pushed back with each correct input in turn while others don’t pose much of a threat of pushing you off the edge on their own, but require many correct inputs to defeat. Sumo isn’t outright bad, but it lacks the tension of Quick-Draw and the frantic sense of danger of Struggle, especially since the majority of Sumo enemies are of the more defensive variety. I also feel like Sumo is used too often and it has a tendency to appear on enemies which don’t have any other types of duels or which have relatively high amounts of health so you sometimes end up needing to win three or four rounds in a row of what I would say is the easiest type of duel in the game in order to defeat a single normal enemy. Basically, Sumo is fine when it’s mixed in with other duels, but its simplicity and its often low difficulty make it boring when it’s all an enemy has to offer.
As for more involved duels, Maze is a good place to start. In Maze your character is represented by an icon and you need to move around collecting stars while avoiding one or more enemies. Star positions are randomized and they only appear one at a time. Though the playing field is small, the screen wraps around both vertically and horizontally, which gives you plenty of options for dodging around enemies while also providing plenty of opportunities for getting hit by enemies which were closer than you may have realized. The number of stars you need to collect and the number of enemies as well as how quickly the enemies move all depend on the enemy type. Unlike the simpler duels, you also have a set number of lives based on the enemy type which aren’t directly tied in to your overarching health so getting hit once or twice won’t result in an outright failure, though it will still result in taking a hit at the end even if you collect all the stars. Most importantly, every enemy with Maze duels has several different maze layouts which these duels can take place in, so it doesn’t get old quickly even though it’s one of the longest duel types. Overall, Maze feels like a neat cross between Pac-Man and Snake.
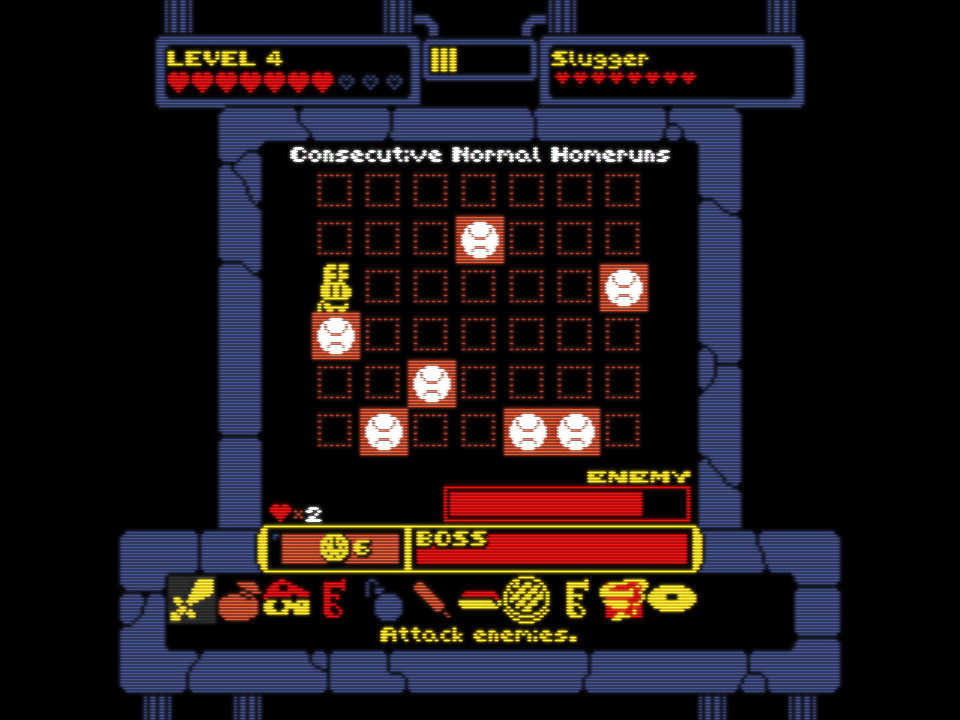
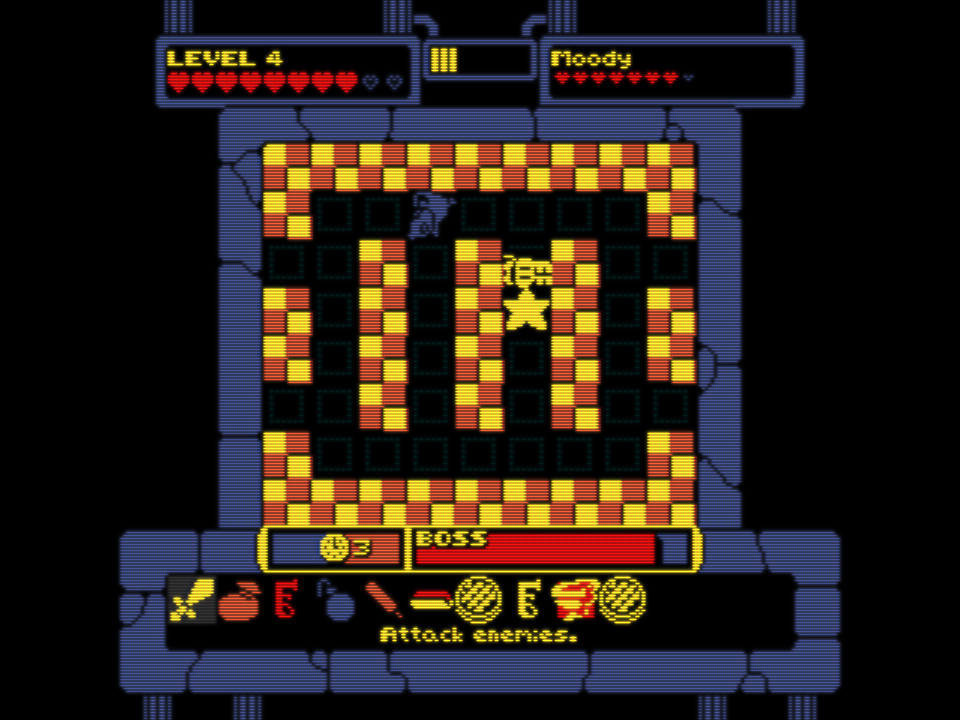
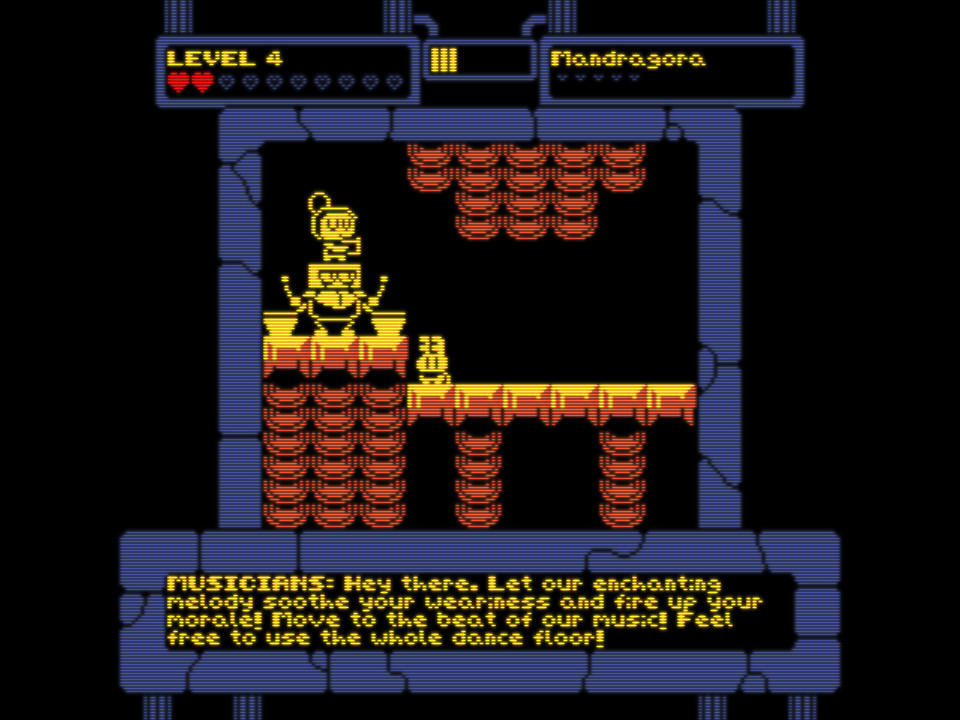
Siege is definitely the duel type which changes the most between enemies. In this one, the play area is divided into a long grid with your character restricted to moving up and down between squares on the leftmost column. A barrage of projectiles will come from the right side of the screen and you simply need to avoid hitting them before time runs out, though you are usually given at least two lives. Siege duels are tough and take up a large amount of time so they are primarily, but not exclusively, encountered during boss fights. You’re often in danger of getting cornered during Siege duels and they tend to demand precise timing to dodge between fast-moving projectiles. Attack patterns vary greatly between enemies so these duels are always interesting, though an issue does exist with a Siege titled “Divine Deluge” where hazards can sometimes appear in such a way that they form a complete column which is impossible to dodge around.
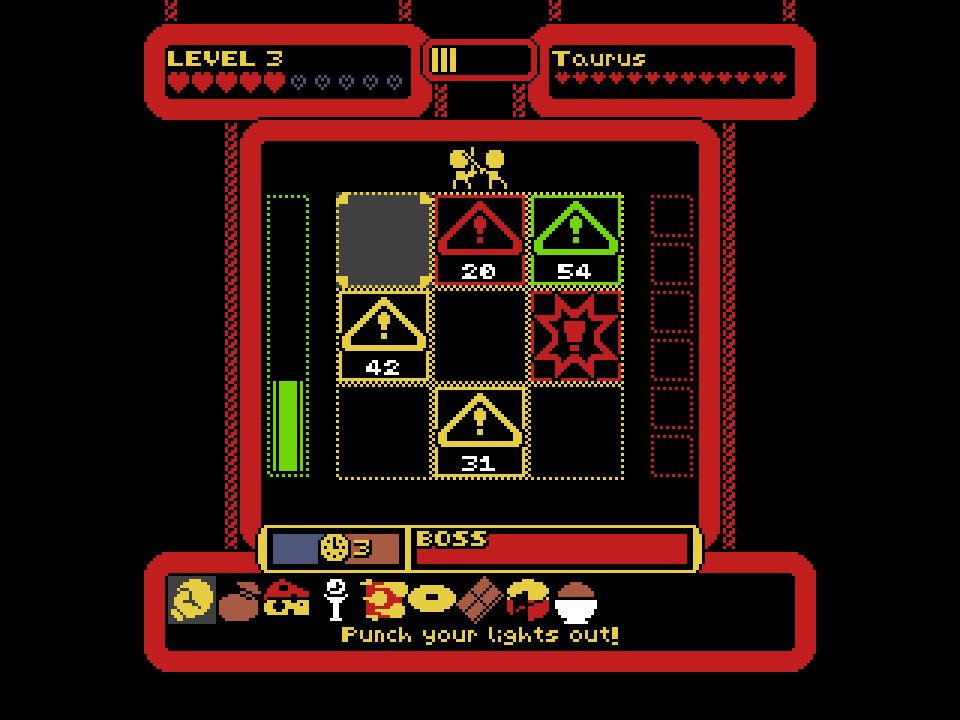
Parry is the last duel which I’m going to be discussing before getting back to talking about the game as a whole and I saved it for the end because it’s my favorite type. In this duel the field is divided into a large 3×3 grid and you control a cursor which defaults to the central space; holding in a direction moves the cursor to the space in that direction and releasing snaps it back to the center. Warning signs will appear in these nine spaces alongside a countdown and when the countdown is almost finished the sign will transform into either a symbol for an attack or a symbol for a feint. Having your cursor over an attack symbol or not over a feint symbol when the timer reaches zero will result in a successful parry which fills a gauge on the left, but trying to block a feint or just not blocking an actual attack will result in a strike on the right. Getting too many strikes results in failure while filling up the gauge results in a draw or a perfect success. What I like about Parry in particular is just how much this simple concept varies between enemies. Some enemies will toss out a mix of attacks and feints, but others might just toss out a string of sudden attacks with short timers or fill the entire grid with delayed attacks which all start to go off after a few seconds, forcing you to pay close attention to the order in which the attacks appeared to be able to get into position in time. Enemies can even specialize in strings of feints. Parry is an all-around great type of duel which combines a simple system with significant differences between enemy types.
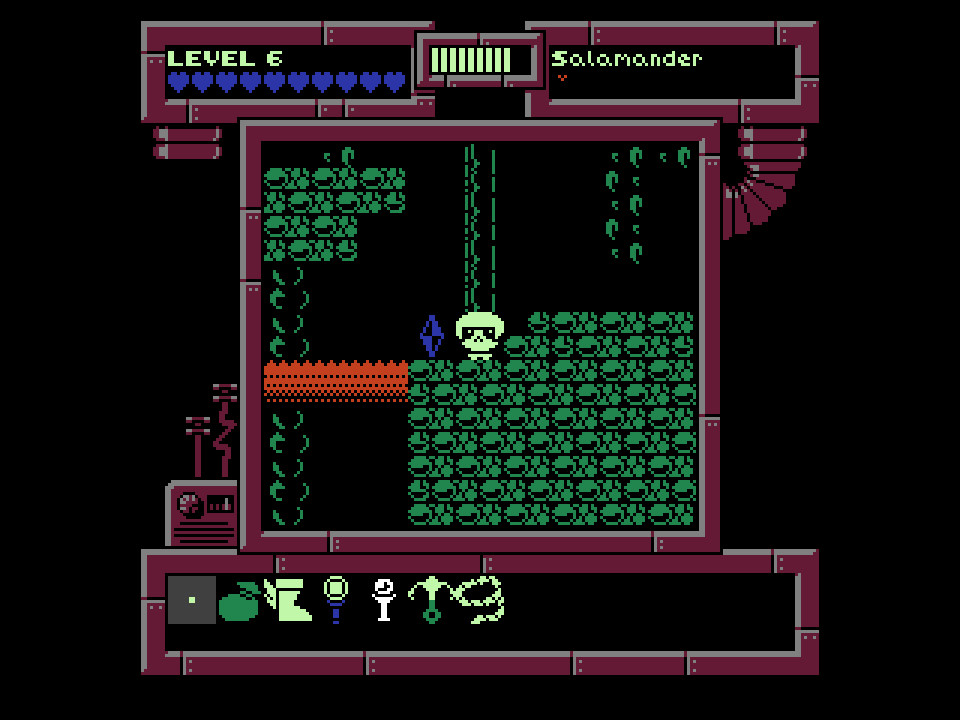
Let’s get back to discussing the game as a whole by taking a look at how it handles exploration. Each of the scenarios actually takes a rather different approach to level design. The initial scenario starts off by firmly dividing regions of the castle vertically with a large, one-way drop at the end of each area as you descend deeper into the castle. This encourages players to fully explore each area before moving on to the next one, though it does start to open up more around the halfway point and you do eventually find ways to backtrack. As for the other scenarios, the second one focuses on smaller areas which are more densely packed and more directly interconnected, the third scenario has extremely large, sprawling areas, and the fourth scenario allows for somewhat freeform exploration where you can choose between areas and more areas are unlocked along the way (the fifth scenario is more of an epilogue than a full-fledged adventure).
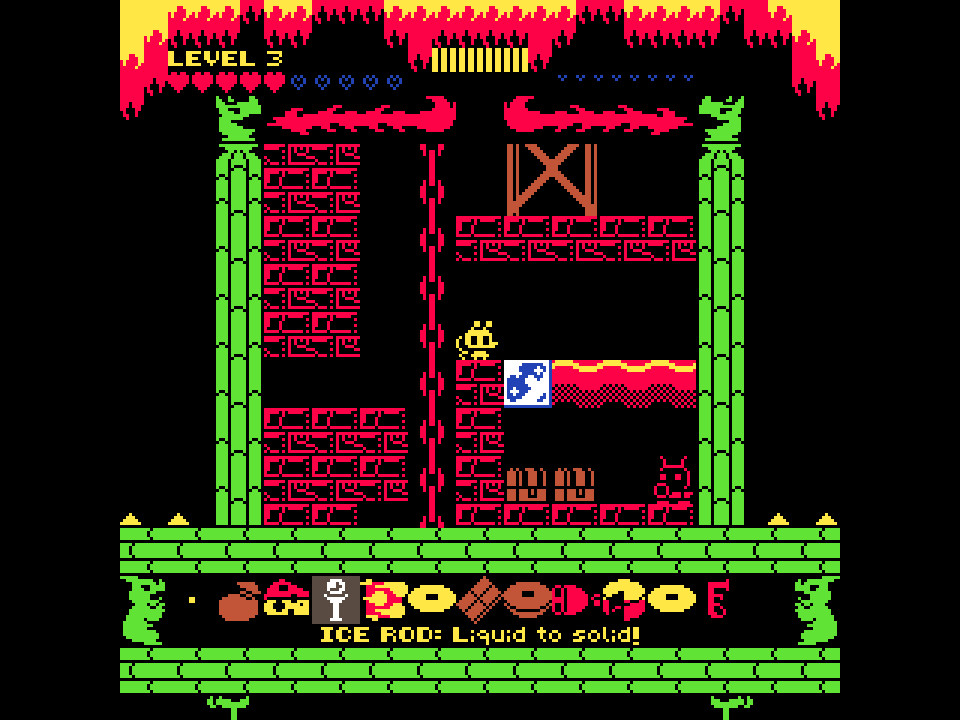
In addition to healing food and experience-granting crosses, you can also find signature attack consumables which cause your character to perform a special attack against an enemy with no retaliation and bombs which can be used to instantly defeat normal enemies. However, the biggest game-changers are the permanent adventure tools which you can find. Some of these tools are just glorified keys, such as a phaser which allows you to walk through certain doors, but most of them add an interesting twist to the basic platforming, such as boots which let you jump over small gaps and an ice rod which can freeze water and lava. These tools allow for all sorts of secrets to be hidden throughout each scenario, making it worthwhile to backtrack to old areas to hunt for previously inaccessible secrets. As to the secrets themselves, they can sometimes just be some consumables or experience points, but they can just as easily be optional boss fights, hidden characters for use in free play modes which are unlocked after beating the scenarios, or literal Easter eggs which can in turn unlock other secrets if you find enough of them.
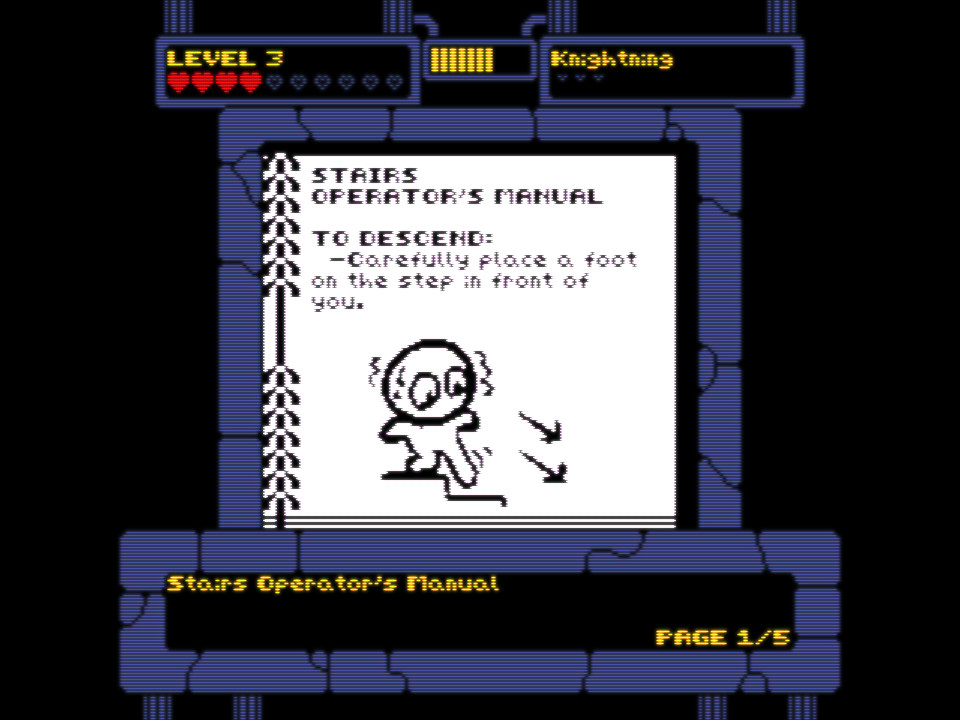
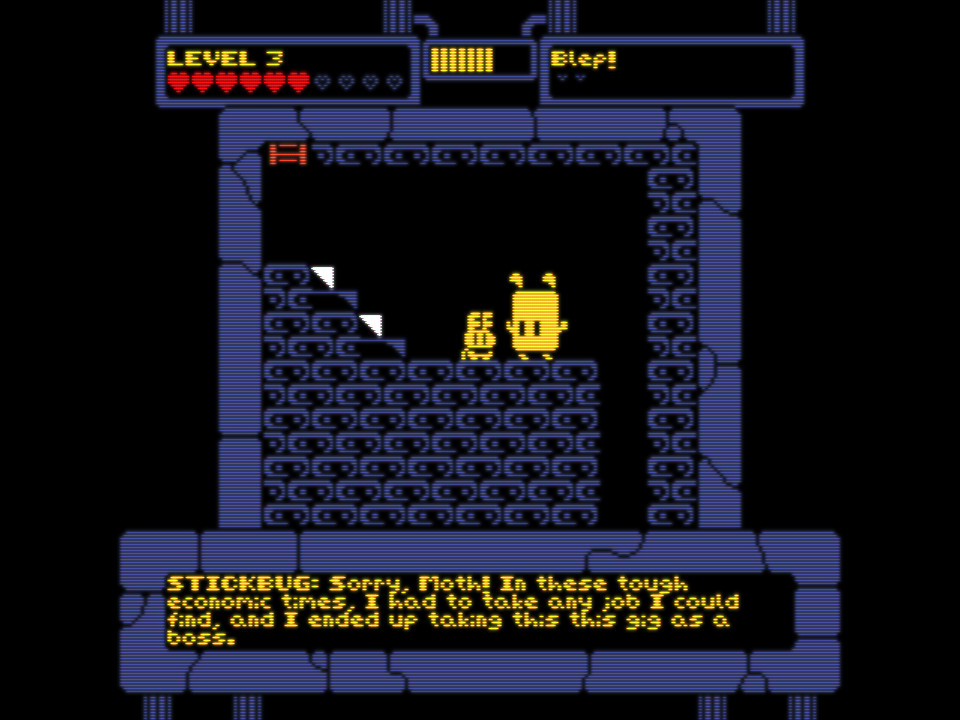
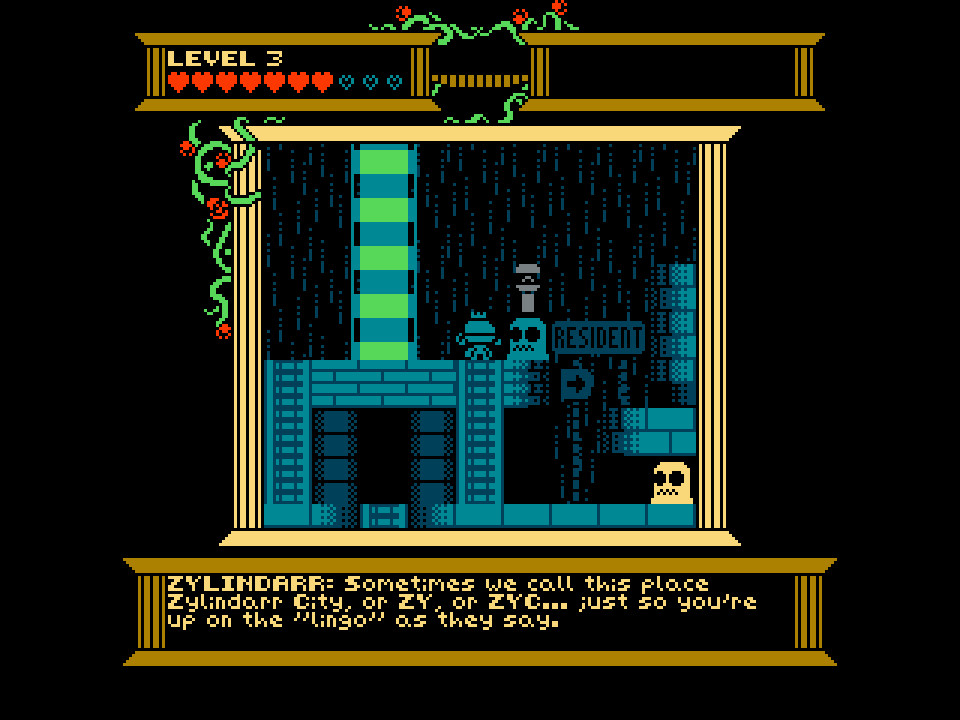
The writing is a particularly strong element of Creepy Castle. The overall tone is lighthearted and comedic, as you might expect of a game with an extensive cast featuring protagonists such as a sword-wielding moth and a boxing butterfly. There is also plenty of funny lore to find throughout the game, such as a meticulous guide on how to use stairs and diaries belonging to castle inhabitants plagued by various problems related to their rooms. However, the game also doesn’t shy away from taking itself seriously when the situation calls for it either. Both the setting and the characters themselves have a rather large amount of background information which is gradually revealed over the course of the game and the entire main cast feel like believable characters by the end rather than just vehicles for jokes. This isn’t to say that the game is trying to ‘trick’ players by making a sharp turn into being dark and edgy as it absolutely does not do that. Rather, this is a game which has taken fun, likable characters and fleshed them out beyond being mere archetypes while also placing them within a rather concrete setting. Creepy Castle also deals with some rather serious subject matter and specifically has an overarching theme of characters coping with loss; combine this with some wonderfully stylized and well-drawn images which look like they fell straight out of a professional comic book and you have a story where players are bound to become emotionally attached to the characters.
The plot does come with one caveat. Without going into spoilers, all of Creepy Castle as it stands is framed very specifically as ‘Season One’ with future content planned at some point, though if it’ll take on the form of a separate game, of paid DLC, or outright free updates I could not say. To be clear, there is a solid story told between the five scenarios with a proper beginning and a satisfying conclusion and there are likewise complete character arcs for all of the playable characters. However, you should not expect every loose end to be tied up nor for all of the setting’s backstory to be revealed by the time the credits roll.
Though the mechanics are the same throughout, each scenario has a distinctive feel. The first one, which must be completed to unlock the remaining three (not including the finale), serves as a solid introduction in many ways as it has a little bit of everything. New duel types are gradually encountered over the course of this first adventure so players can get accustomed to each of them and every area has a nice mixture of enemies. Experience and consumables are all over the place and there are even one-time-use healing rooms where you can dance to restore your health if it’s too low so getting an actual Game Over from combat is unlikely unless you’re rushing. That said ,there are also plenty of traps which also get gradually introduced, starting from falling ceiling tiles and gradually ramping up to spikes and fireballs. There are dozens of NPC’s to talk to and quite a few books to find and every member of the main cast appears at some point, so this scenario also helps to set up the tone, the world, and the characters for later. Even the exploration is gradually expanded with later areas becoming slightly bigger and less linear and the scenario as a whole is very careful about waiting until the later parts to introduce a few items which affect your exploration capabilities.
The second scenario is by far the shortest of the four, lasting only around an hour, and it’s a bit of a mixed bag. Areas are small, though they still have their share of secrets, and there aren’t any environmental hazards because this one is focused on ‘action’. There aren’t any NPC’s around to talk to, but there is some interesting lore to discover and there is a brief cutscene at the start of each area. In general, the second scenario ends up feeling like a sparser, weaker version of the first scenario. It’s still enjoyable, but it feels like it’s lacking in defining features so it’s a bit bland. The biggest issue with this scenario is that you basically need to play through the whole scenario twice to see the full ending. It’s short and you can always choose to move on to a difference scenario before going for the second run, but it doesn’t change the fact that it feels like unnecessary padding. The ending segment for the second run is actually rather involved and worth the effort, but as far as I can tell the only difference other than the final portion is a single secret with everything else on the second run being exactly the same right down to the enemy placement. Overall, this is still an okay scenario, but definitely not my favorite.
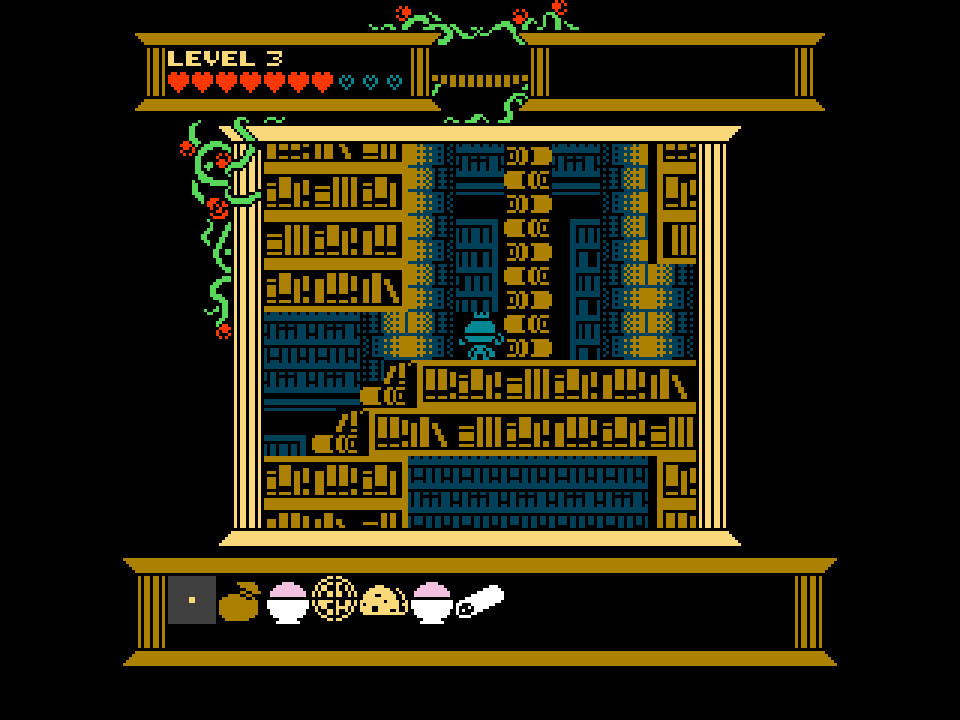
The third scenario is one which I’m confident some players will say is their favorite, and there’s certainly nothing wrong with liking it, but for me this is the only scenario which I outright dislike. This is undeniably the largest scenario both in terms of size and in the amount of time it takes to complete. It’s also the most unique scenario of the lot as it leans in more heavily on the retro feel than the other ones. With no lore to discover and almost no dialogue, this one is all about exploration. Each area is massive with paths frequently splitting in multiple directions. There are two types of ‘keys’ here, namely rocks which are used to open normal doors and golden rocks which are used to open special gold doors which usually are used to block off the door leading to the next area. You only need to actually find every key if you care about unlocking a secret at the end, which is good as the sheer size of the scenario makes backtracking tedious even with shortcuts. There are plenty of switch puzzles and environmental hazards along the way and, since this is the exploration scenario, it introduces a lot of cool new exploration tools.
Up to this point the scenario still sounds fine other than backtracking being a pain, but that’s to be expected of such a large map and the worst of it is optional anyway. In fact, there are only really two issues with this third scenario, but they are both rather annoying. First, the map is almost useless as all it consists of is brown squares to indicate where you’ve been and yellow squares to indicate save points. This is the same map used in every scenario and it’s definitely not the best map in general, but it’s a particular problem here because it ends up looking like a giant glob of indistinguishable brown with no indication of walls, doors, or ladders, making it impossible to know if a gap is a spot you previously couldn’t reach or just a part of the map which isn’t accessible while giving almost no information as to the actual layout of an area other than at the very edges. The other issue is the enemy variety, or rather the lack of it. The entire first area is a massive cavern filled with bats whose only duel is Quick-Draw and lizards which have more default health than the bats and only have the Sumo duel. Multiple copies of the same enemies, usually lizards, are also sometimes placed next to each other to block off keys, which means a whole lot of Sumo. The second area isn’t much better as it is filled with the same bats and lizards, but adds in spiders which only have access to the Maze duel. Even the third area only has one enemy, though it’s a different, more interesting type which isn’t used as frequently, and it’s not until the fourth area that variety starts to kick in.

All of this is made worse by one of the unique traits of the third scenario; there are no consumables to be found other than red crystals which heal two hearts immediately after touching them, but using a save point fully heals you and revives every enemy, which can be a nightmare if you aren’t already familiar with the layout of an area. The lack of duel variety for the enemies also oddly extends itself to the ‘bosses’ of this scenario which, other than the final boss and a recurring miniboss, each only have a single duel which they use over and over. Several of the bosses are entirely optional and, unlike bosses in other scenarios, you can step away from them after initiating combat, so if you need to you can return to a save point to heal up to full and then walk back to the boss fight even though the boss will not have recovered its own health. Those with a certain nostalgic fondness for labyrinthine adventure RPG’s of yesteryear may find joy in the open nature of this scenario and it does admittedly gradually improve after the first two areas, but for me it was an exercise in frustration and tedium.
The fourth scenario is my favorite and, if nothing else, it definitely made up for any qualms I had with the third scenario. You start out with immediately being able to choose between four areas. The areas themselves range from short to massive and each has a distinct look and feel. Exploration tools are spread out between three of the four, with the fourth being a sort of hub where you can interact with quite a few NPC’s. In order to allow for this more freeform sense of exploration, consumable items exist and enemies still don’t ever respawn, but you also never level up. In addition to the initial four, several more areas become available after finishing up various objectives. There are a few fun puzzles along the way and the bosses here are among the best in the game with some clever twists and tough duels. From a storytelling perspective, the primary cast of this scenario is likely the strongest because the characters bounce off of each other particularly well, melding together some of the silliest and some of the most serious dialogue in the game without skipping a beat. The largest area in this scenario starts to wear thin by the end of it as, even though it’s not lacking in enemy variety like the areas in the third scenario, it goes on for long enough that you still fight all of its enemies a few too many times. Other than that fairly minor stumbling point, this scenario is fantastic.
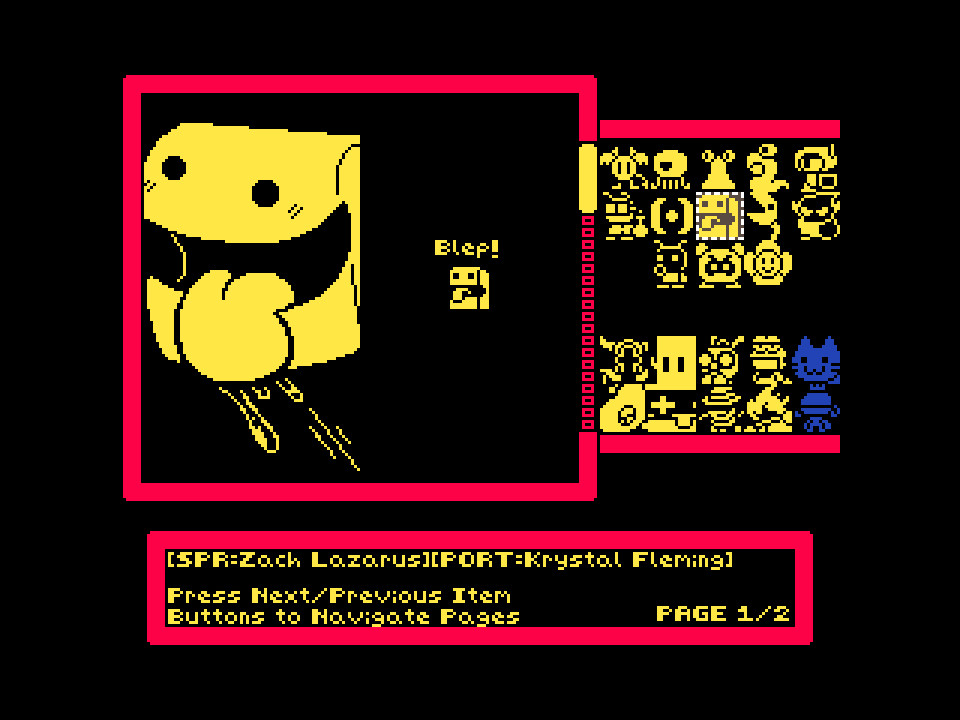
Let’s at last wrap up this rather long article by taking a quick look at a few of Creepy Castle‘s bells and whistles as well as spots where it could use a bit more polish. Aesthetically, this game has some significant options. In addition to being able to toggle bloom and scanlines, you have 14 color palettes to choose from and 11 border options for the play area and health bars. You can even choose between displaying the health as hearts or as bars or a combination of the two and, if you want to tone down the retro feel a bit, you can change the blocky tile-based movement to smoother movement. Beyond aesthetic options, the spritework has a lot of charming character to it, the more detailed pictures are incredible, and the soundtrack is likewise exceptionally memorable. If you want to know more about the setting, every piece of lore you find is permanently accessible from the main menu alongside a bestiary complete with flavor text, animated sprites, and battle portraits. Songs are also available to listen to from the main menu after hearing them in-game.
As to where the game could use some more polish, the save system is definitely odd. Each scenario takes up a save slot of its own, but you also only have three slots and five scenarios along with bonus versions of the scenarios where you can use optional characters. In other words, it’s set up in such a way that players must inevitably delete their older saves in order to make room for playing new scenarios. The map is another shortcoming as it just doesn’t give enough info. It may only really be an issue in the third scenario, but only marking down save point locations and not even things such as entrances and exits makes the map horribly limiting. Lastly, areas in general feel like they could use some trimming or at least less frequent enemy encounters. This is especially true for the largest areas in the game, though even the shorter areas start to run into the issue of throwing the same enemies at players a few times too many by the end.
With all that said, this analysis of Creepy Castle at last comes to a close. Playing through this game was a uniquely memorable experience and even with a few bumps along the way I do not remotely regret the time I spent with it. There is nothing else quite like it out there at the moment and it leaves a lasting impression due as much to its overall high quality as to its daring experimentation. I highly recommend Creepy Castle to just about everyone and I eagerly look forward to seeing what Dopterra has in store for the future.